Running Bitcoin Core on a Raspberry Pi
⚠️ This post contains outdated information, and I instead recommend following the excellent tutorials over at Raspibolt. ⚠️
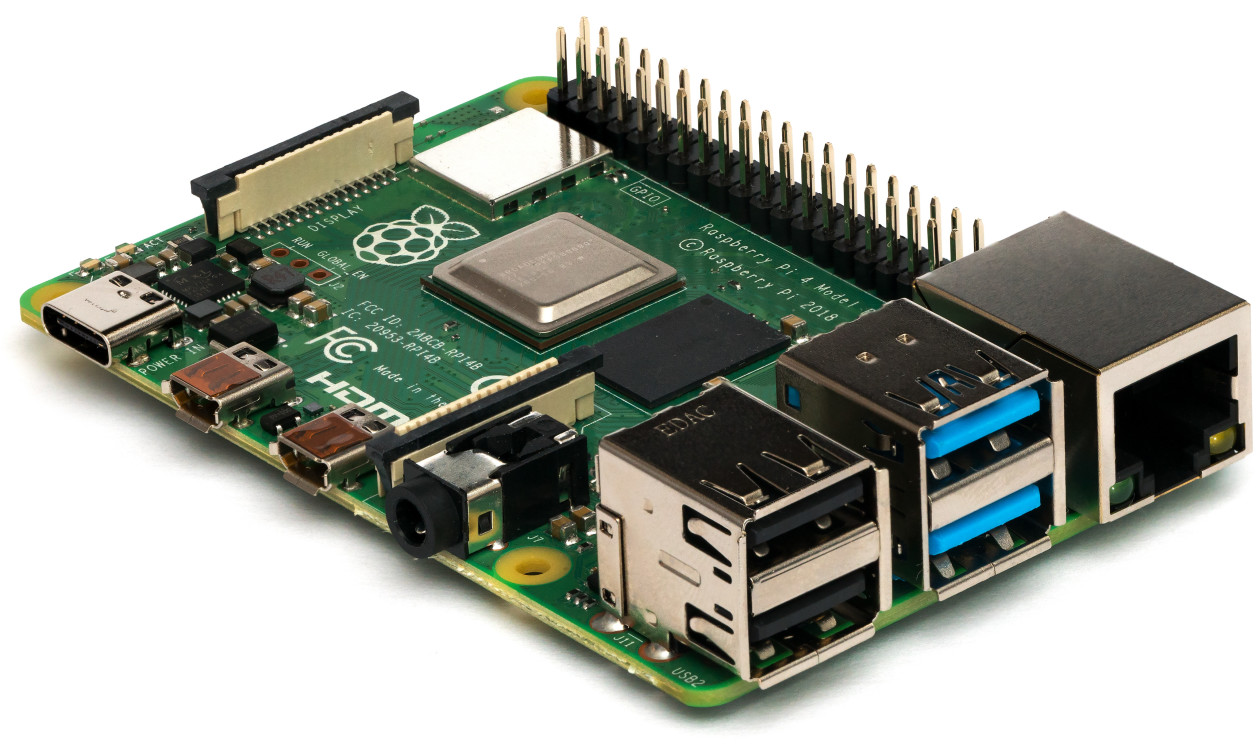
This article will describe how to get Bitcoin Core full node up and running on a Raspberry Pi 4 Model B. To store the blockchain (which currently is close to 500 GB), I’m using a 1 TB SSD.
Raspberry Pi OS
Start by downloading and running the Raspberry Pi Imager on your computer.
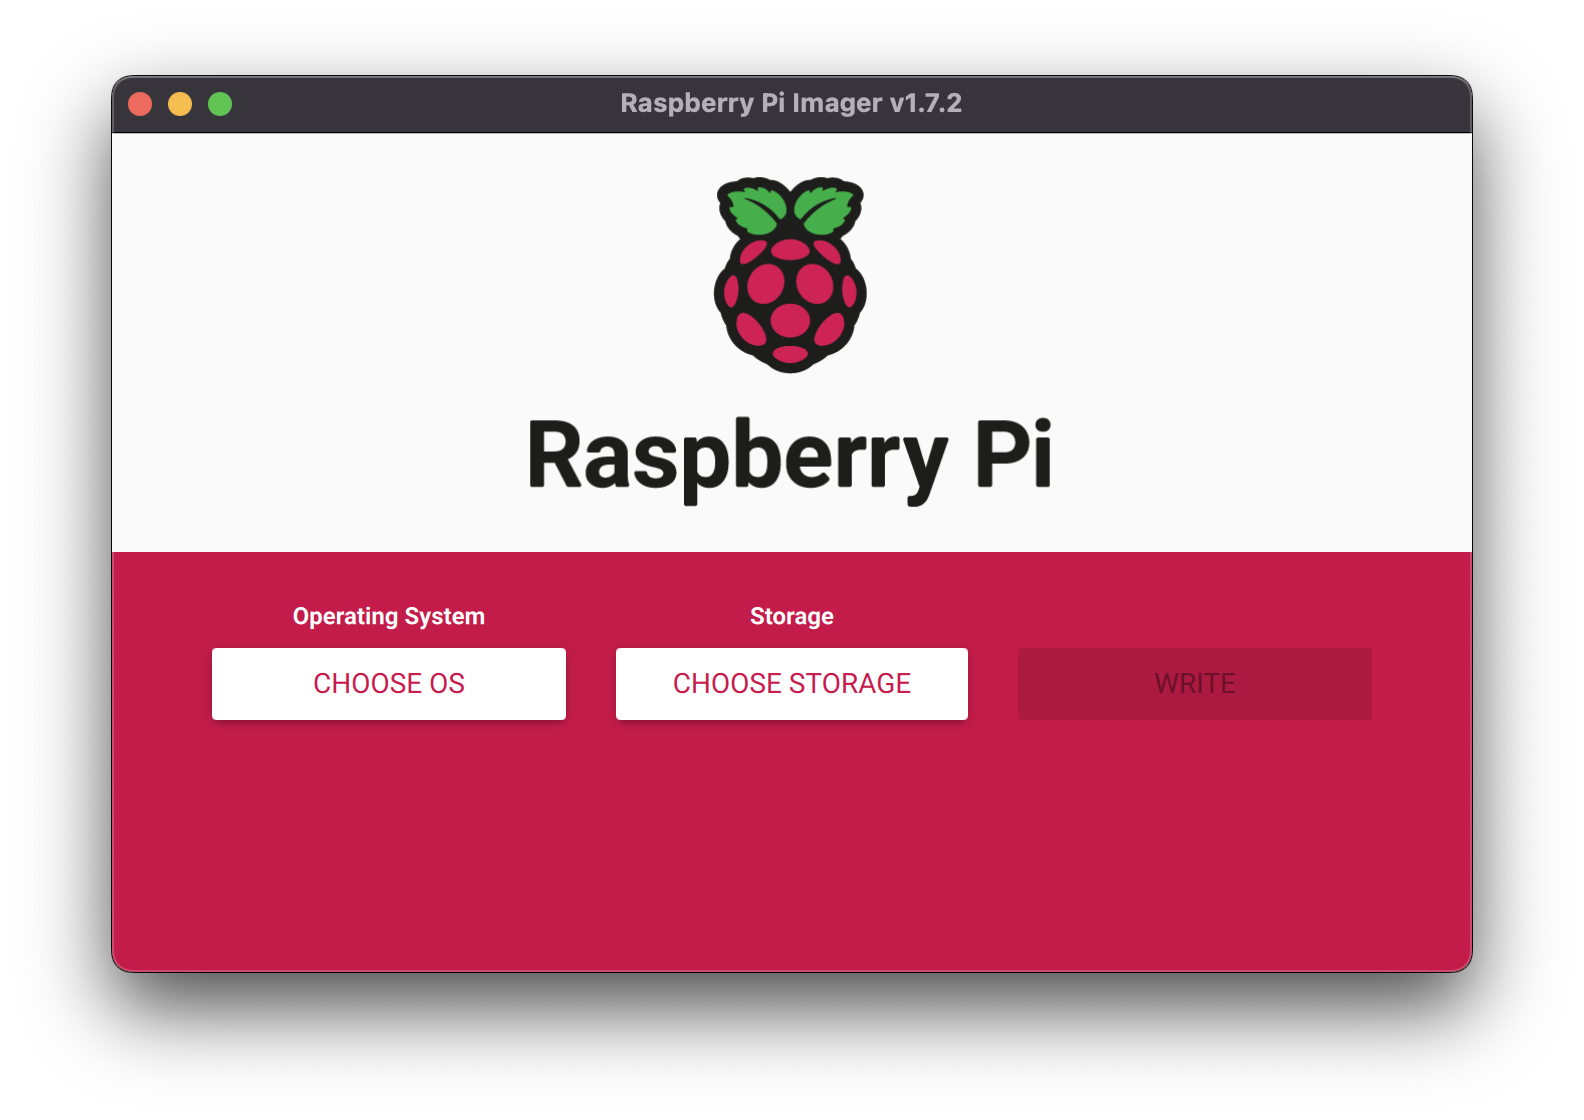
- Click CHOOSE OS. I’ll not be using the GUI here, so I selected “Raspberry Pi OS (other)” and then I chose the “Raspberry Pi OS Lite (64-bit)”
-
Insert the MicroSD card into your computer and select it from CHOOSE STORAGE.
-
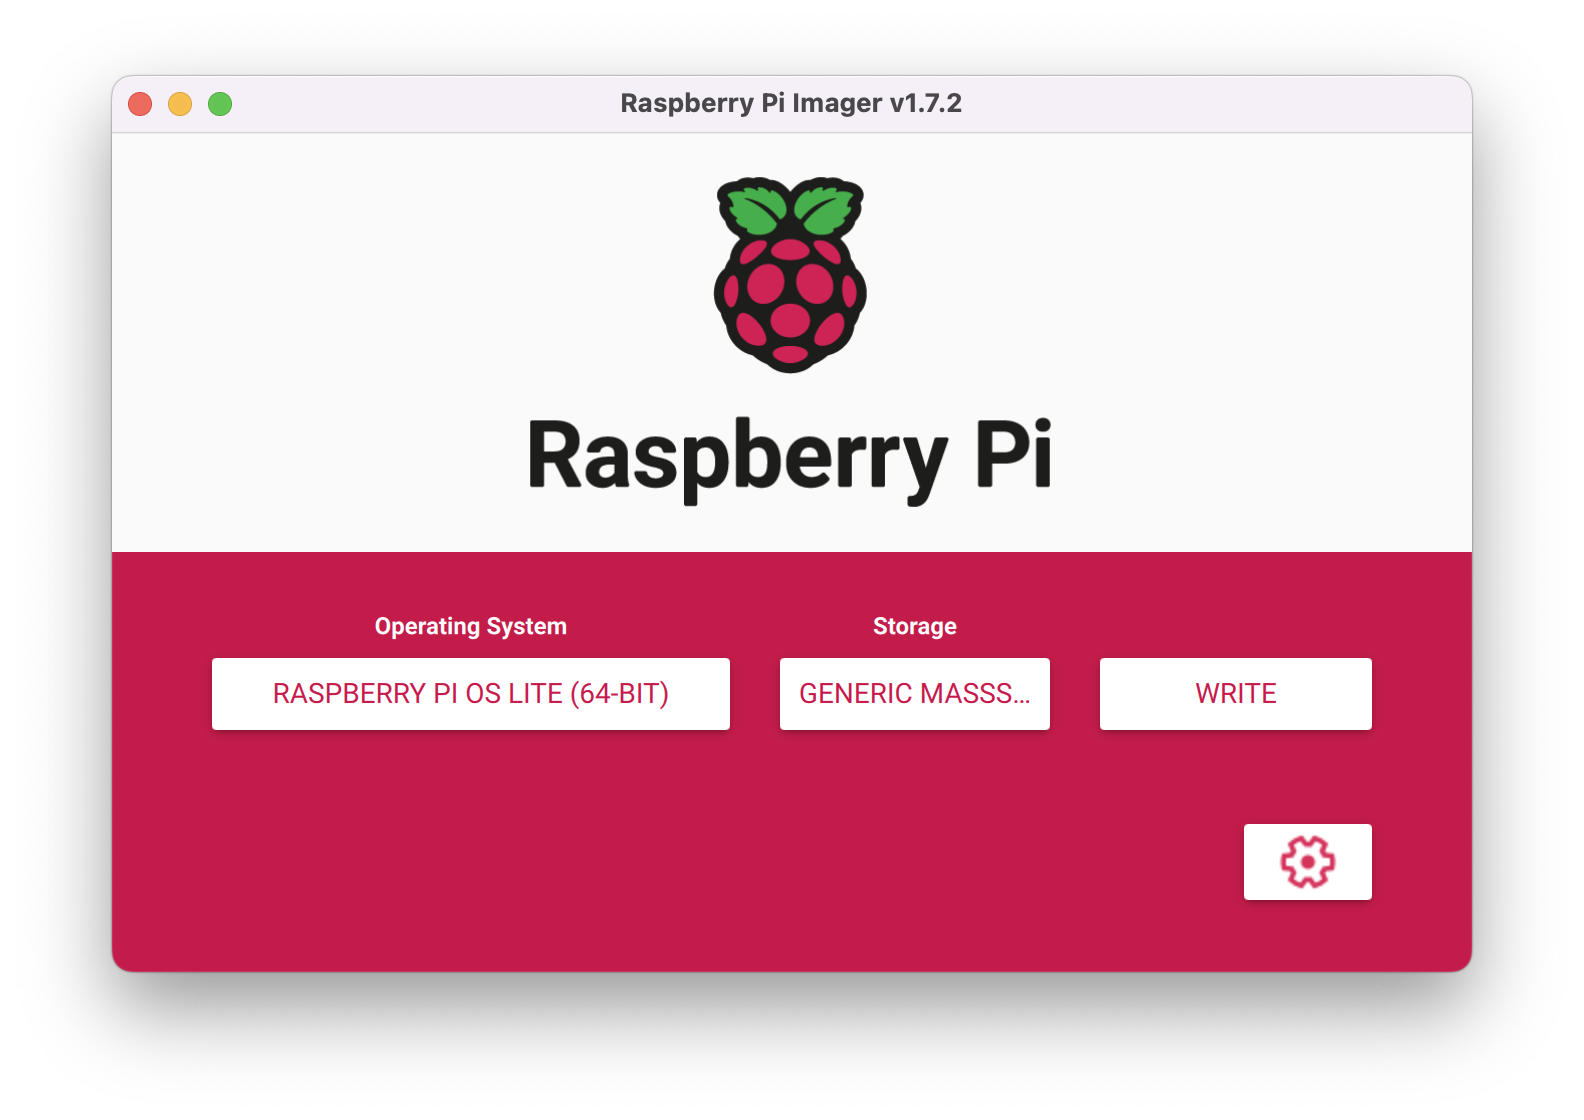
Click on the gear icon that will appear in the bottom right hand side corner.
There, you’ll want to do some changes:
- Set the hostname
bitcoin.local. - Enable SSH with a username and a password (I chose satoshi as the username).
- Set the locale with your time zone and keyboard layout.
- If you need Wifi, you can enable it here as well.
- Set the hostname
- Finally, click the WRITE button. When it’s done, remove the MicroSD card from your computer and insert it into the Raspberry Pi.
SSH and updating the OS
After starting the Raspberry Pi, open a terminal on your computer and connect to the Raspberry Pi via SSH:
ssh satoshi@bitcoin.local
You’ll get a warning saying that “the authenticity of host bitcoin.local” can’t be established. Type “yes” and press enter. Then you’ll enter your password that you set up earlier.
Start by updating the Raspberry Pi OS to the latest and greatest:
sudo apt-get update -y && sudo apt upgrade -y
Setting up the external hard drive
The bitcoin block chain will be stored on the external hard drive, so let’s set that up that next.
Given that the hard drive is physically connected to the Raspberry Pi, we can look for it with
sudo fdisk -l
In my case, it’s /dev/sda.
First, we need to create a new file system. Since we’re only going to access the data through the Raspberry Pi, we can use ext4. Do note that any existing data on the drive will be erased.
sudo mkfs.ext4 /dev/sda
Let’s mount it manually:
sudo mkdir /media/ssd/bitcoin
sudo mount /dev/sda /media/ssd
We’d like the hard drive to automatically be mounted when the Raspberry Pi boots. To fix that, copy the UUID from the command sudo blkid
Now, let’s add the following line to sudo nano /etc/fstab, replacing <UUID> below with your value:
UUID=<UUID> /media/ssd ext4 defaults,auto,users,rw,nofail 0 0
Bitcoin Core
Finally, we’re ready to install Bitcoin Core. You have two options. Either you can download the binaries, or you can build them yourself from source. This article covers the first option.
Download
Go to https://bitcoincore.org/en/download/ and choose the corresponding ARM Linux 64-bit download link. Then, download it with wget:
wget https://bitcoincore.org/bin/bitcoin-core-23.0/bitcoin-23.0-aarch64-linux-gnu.tar.gz
Verify
Start by downloading the SHA256 binary hashes and hash signatures found on the download page:
wget https://bitcoincore.org/bin/bitcoin-core-23.0/SHA256SUMS

wget https://bitcoincore.org/bin/bitcoin-core-23.0/SHA256SUMS.asc
-
Verify that the checksum of the release file is listed in the checksums file using the following command:
sha256sum --ignore-missing --check SHA256SUMSIn the output produced by the above command, you can safely ignore any warnings and failures, but you must ensure the output lists “OK” after the name of the release file you downloaded. For example:
bitcoin-23.0-aarch64-linux-gnu.tar.gz: OK -
Bitcoin releases are signed by a number of individuals, each with a unique public key. In order to recognise the validity of signatures, you must use GPG to load these public keys locally. You can find many developer keys listed in the bitcoin/bitcoin repository, which you can then load into your GPG key database.
For example, given the builders-key/keys.txt line
E777299FC265DD04793070EB944D35F9AC3DB76A Michael Ford (fanquake)you could load that key using this command:gpg --keyserver hkps://keys.openpgp.org --recv-keys E777299FC265DD04793070EB944D35F9AC3DB76AThe output of the command above should say that one key was imported, updated, has new signatures, or remained unchanged.
-
It is recommended that you choose a few individuals from this list who you find trustworthy and import their keys as above, or import all the keys per the instructions in the contrib/builder-key README. You will later use their keys to check the signature attesting to the validity of the checksums you use to check the binaries.
Verify that the checksums file is PGP signed by the release signing key:
gpg --verify SHA256SUMS.ascThe command above will output a series of signature checks for each of the public keys that signed the checksums. Each signature will show the following text:
A line that starts with:
gpg: Good signatureA complete line saying: Primary key fingerprint:
E777 299F C265 DD04 7930 70EB 944D 35F9 AC3D B76AThe output from the verify command may contain warnings that the “key is not certified with a trusted signature.” This means that to fully verify your download, you need to confirm that the signing key’s fingerprint (e.g.
E777 299F….) listed in the second line above matches what you had expected for the signers public key.
Install
tar xvf bitcoin-23.0-aarch64-linux-gnu.tar.gz

sudo install -m 0755 -o root -g root -t /usr/local/bin bitcoin-23.0/bin/*
Run
If everything is working as expected, you should be able to run
bitcoind -version

Bitcoin Core version v23.0.0
and
bitcoin-cli -version

Bitcoin Core RPC client version v23.0.0
Since we’re using the Raspberry Pi as a dedicated Bitcoin full node, we‘ll want the daemon to start whenever the machine boots.
To do so, let’s create a new system service file:
sudo nano /etc/systemd/system/bitcoind.service
Here‚ we’ll paste in the content from bitcoind.service, doing some changes:
- Set the conf to
/media/ssd/bitcoin/bitcoin.conf \ - Set the datadir to
/media/ssd/bitcoin - Set the values of
UserandGrouptosatoshi.
Save the file and exit.
We now need to create a PID file:
sudo mkdir /run/bitcoind
sudo chown satoshi:satoshi /run/bitcoind/
echo $$ > /run/bitcoind/bitcoind.pid
Enable the systemd setup with the following commands:
sudo systemctl enable bitcoind
sudo systemctl start bitcoind
Reboot and check that everything works
Finally, restart the computer with sudo reboot and reconnect with SSH after a few seconds.
And that the hard drive has been mounted correctly:
We can verify that it has been mounted correctly:
df -h | grep /media/ssd
/dev/sda        916G   24M  870G   1% /media/ssd
And Bitcoin Core should now also be running:
tail -f /media/ssd/bitcoin/debug.log
Aliases for using bitcoin-cli
Since we need to specify -datadir=/media/ssd/bitcoin every time we want to run commands with bitcoin-cli, it makes sense to make a couple of aliases in .bash_aliases:
nano ~/.bash_aliases
and then append this line:
alias bitcoin-cli='bitcoin-cli -datadir=/media/ssd/bitcoin'
Save the file, then run:
source ~/.bashrc
Bash completion
It quickly gets tedious to write the various bitcoin-cli commands. To help with autocompletion, a bash completion scripts are available for both bitcoind and bitcoin-cli. Let’s download them:
wget https://raw.githubusercontent.com/bitcoin/bitcoin/master/contrib/bitcoind.bash-completion

wget https://raw.githubusercontent.com/bitcoin/bitcoin/master/contrib/bitcoin-cli.bash-completion
To figure out where to put them, we can run:
pkg-config --variable=completionsdir bash-completion
returning, /usr/share/bash-completion/completions. So, let’s move them there:
sudo mv bitcoind.bash-completion /usr/share/bash-completion/completions/bitcoind
sudo mv bitcoin-cli.bash-completion /usr/share/bash-completion/completions/bitcoin-cli
Initial block download
The blockchain will now sync all the way back to the first block in 2009, so this will take some time given that it’s close to 500 GB. Your node will download all blocks and all transactions and verify them.
To check on the process, run
bitcoin-cli -getinfo

Chain: main
Blocks: 620898
Headers: 750609
Verification progress: ▒▒▒▒▒▒▒▒▒▒▒▒▒▒░░░░░░░ 67.4104%
Difficulty: 15486913440292.87

Network: in 0, out 10, total 10
Version: 230000
Time offset (s): -7
Proxies: 127.0.0.1:9050 (ipv4, ipv6, cjdns)
Min tx relay fee rate (BTC/kvB): 0.00001000